![logo.svg]](https://aide.qidigo.com/hubfs/Qidigo_April2019%20/Images/logo.svg)
Video:
Steps:
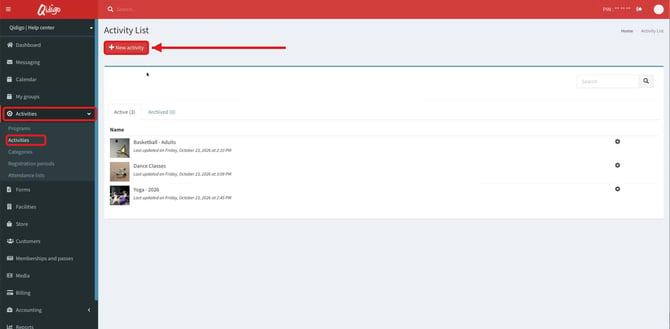
1. Click New activity
In your admin portal, click “Activities” in the left-hand menu, then “Activities”. Click the red “New activity” button.
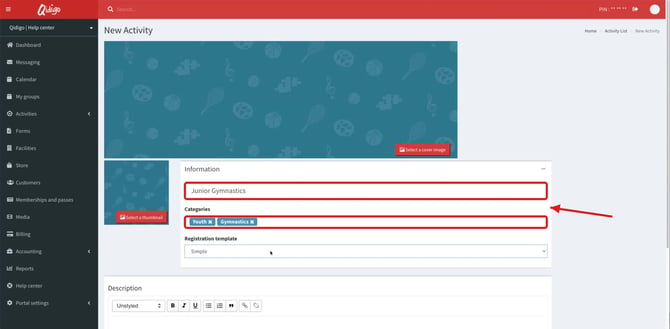
2. Enter the name and choose the categories
Enter the name of your activity, for example Junior Gymnastics. In “Categories”, select one or more categories, for example “Youth” and “Gymnastics”. Categories let your clients filter activities on your registration portal.
3. Choose the registration template
In “Registration template”, select “Simple” or “Multiple” (see the table below).
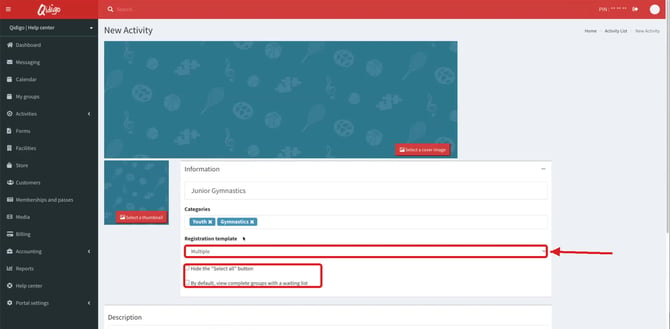
ℹ️ Note: when you select “Multiple”, two options appear: “Hide the "Select all" button” and “By default, view complete groups with a waiting list”.
At a glance: Simple or Multiple?
| Criteria | Simple | Multiple |
|---|---|---|
| Groups per registration | One group of the activity at a time | Several groups of the same activity at the same time |
| Typical use | Levels where a participant only takes one (beginner, intermediate, advanced) | Classes a participant can combine (e.g. several days of the week) |
| Extra options | None | “Hide the "Select all" button”, “By default, view complete groups with a waiting list” |
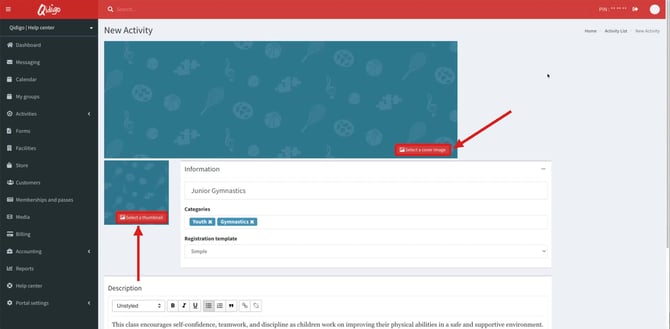
4. Customize the images
Click “Select a thumbnail” to choose the image clients see in the activity list, before they click on the activity. Click “Select a cover image” to choose the image displayed at the top of the activity page, above its groups.
5. Add a description and save
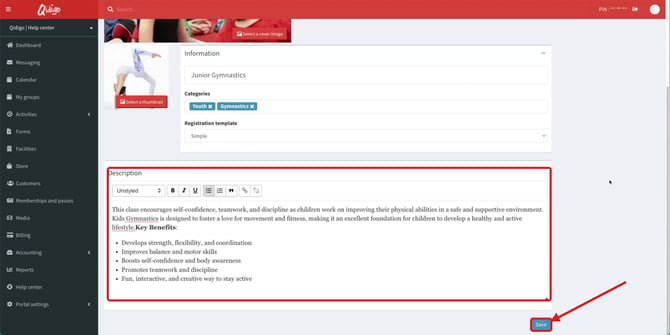
Add a description of your activity in the “Description” section, then click “Save”.
6. Check the confirmation
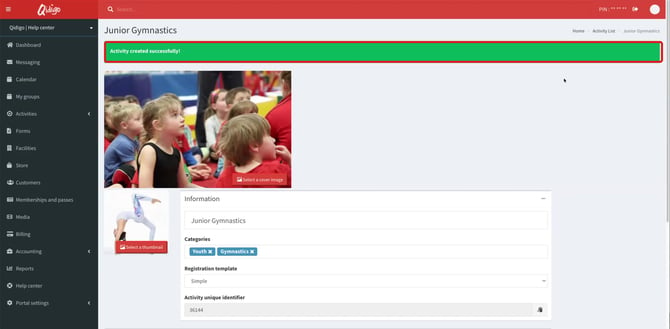
The message “Activity created successfully!” appears.
7. Find the activity in the list
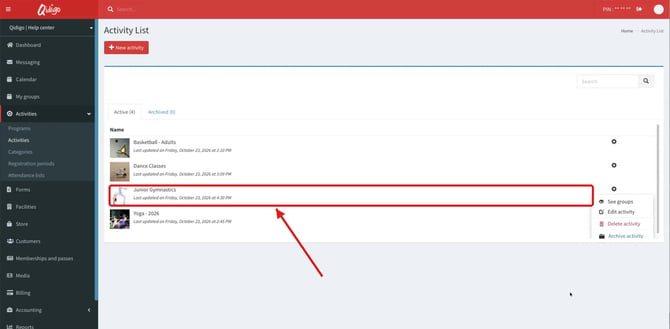
Click “Activities” > “Activities”: your new activity appears in the “Activity List”.
Delete an activity
8. Click Delete activity
Click the gear icon at the end of the activity's row, then “Delete activity”.
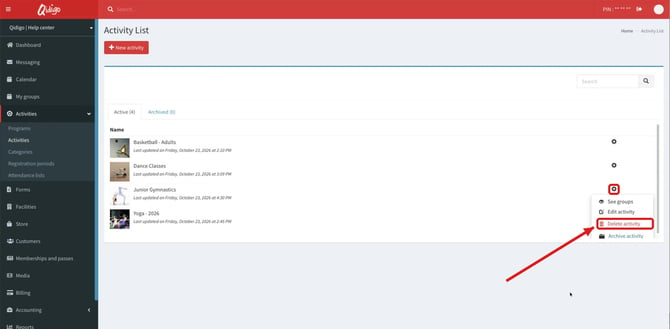
⚠️ Warning: you can only delete an activity that has no groups linked to it. To keep an activity without displaying it, use “Archive activity” instead.